Latest Stylish Kurti Neck Design Cutting and Stitching Tutorial
Kurti Neck Design!
Who doesn’t want to be in a limelight? Especially when you are appearing in public parties where you think that you should go minimal but even wants to at same time flaunt your style.
Don’t worry we have got you covered and will always. Go through these easy breezy styles to warm up your game of acing highest perfection in fashion. Which you can recommend to your tailor or even can DIY (a win win situation).
Very Unique Neck Design (Easy Way) Cutting and Stitching
Let’s have a look on our first beautiful design that will make you set apart from the crowd. The steps:
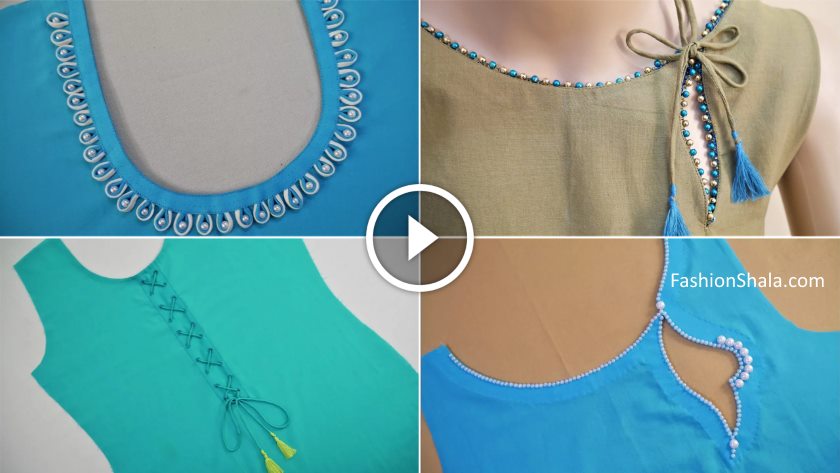
- First, we will take buckram fabric for the designing doubly. Marking the breadth length and depth according to your own size.
- We will then join the marks by making a straight line from two sides(a rectangular shape).
- Give a half circle shape from one edge to another then we will mark a dotted line parallel to the first line.
- Then we will cut the design from buckram and paste it on the cloth (f your doesn’t have the buckram fabric as glued one you should stitch it).
- We will now cut the extra remaining cloth according to our design (to get rid of shabbiness) from all the four side and the remake part will cover the buckram and we will afterwards stitch it.
- We will afterwards fold the cloth and will mark it in the middle and will cut a small mark on the top.
- Now we will take our kurti’s cloth and will fold it and mark in the middle of it and will cut a small mark on the top. Then we will place the design on the kurti (making sure that the straight lines of both intersect on one another).
- We will stitch both the cloth and design in the middle and then also around the buckram too.
- Cut then the inner part and leave a little cloth to just cover the rest buckram and we will cut them in the middle from both sides (keeping sure that our stitches won’t come out).
- We will turn the cloth upside down and then we will finally stitch the design from outer edge.
- Take two cloth strings and then cut it into small pieces. Then we will join the pieces and will fold it in a semi-circle shape.
- We will place these small semi-circle pieces from the other side of the buckram and will stitch it making sure that there are no loops. You can add pearls in between for that extra charm.
Useful Read: Latest stylish sleeves designs for kurti / kurta
Latest and Easy Neck Design Cutting and Stitching
Let’s go on making yet another exuberant design:
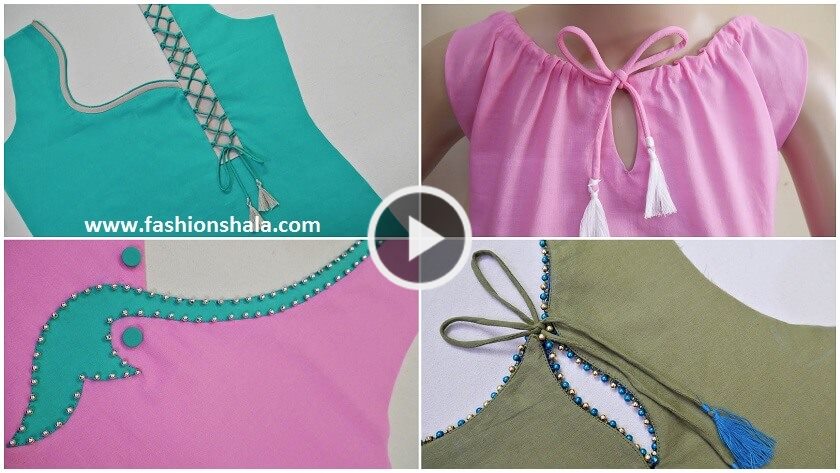
- This design can go very well with the boat neck and even with the simple neck. We don’t need buckram fabric for it. We will start simply it on our cloth material.
- Mark our neck and the depth of it first. Then join the neck’s mark and the depth of our neckline then from it we will mark a semi circle for our neck.
- Now cut the semi-circle design and cut a small mark on the edge. Then mark till 10 inches and join it with a dotted line.
- We will take a cloth stripe of almost 2 or 2.5 inches. Then place it on the dotted lines in the middle (till 10 inches and fold it from both upper and lower side and cut a small mark on the top middle).
- We will also mark the cloth stripe making sure that it befalls on the lower dotted lines.
- Stitch the both lines. And then we will fold from the sides the stripe from inner side to give a more clear look and stitch all around.
- We will cut from the upper side the extra cloth stripe and then we will again take a cloth stripe and will place it on the neckline and will stitch it from all the sides and leave the rest stripe.
- Then take the rest stripe and we will fold it doubly and then make a running stitch on it from all over.
- We will then mark 1 inch from both the sides on the lying cloth stripe from both upper and lower side and we will join them with a straight line.
- From the upper side we will mark 1/2 inch and then we will mark one one inch till down from both sides and we will join them by straight line (making it look like a ladder).
- We will from top side fold the cloth and cut an extremely small cut in the on those marked points and will similarly do it on all the rest marked points.
- We then from the back side (where the circle is formed because of cutting a mark) we will stitch it from a needle a bit far and then we will take the needle from the circle and make sure we will complete all the circle with thread (assure it follows all the rest circles even).
- Then we will take two cloth strings and we will insert them through these holes first straight in the holes but then we will give cross pattern to it till downwards (or you can simply make a criss cross or a zig zag pattern too).
- We will then take out from the last hole the remaining strings and we will then make a butterfly pattern at the end.
Useful Read: Beautiful Kurta Neck Design Cutting and Stitching Tutorial
Very Creative Neck Design (Boat Neck) Cutting and Stitching
Let’s learn another intricate yet exquisite design:
- We will make a boat neck design. First we will take buckram fabric and go along marking all the sections according to your own size and choice. (Length, width, depth).
- Join the lines and then make a half circle pattern inside the joined lines. We will then cut it. After it we will open the buckram fabric and we on one edge will mark half inch and then after there to 3 inch we will draw a straight line downwards till upto 5 inch or 4.5 inch (the choice is yours).
- We will make a heart shaped design with a slight slant and leave a space on the top for stitching and cutting purpose.
- Then mark almost from 1 inch distance the same design from one end to another and then finally we will cut the design from the buckram fabric.
- We will paste the buckram design on a cloth with the press if your buckram doesn’t have the glue already then you should stitch it all around and then finally cut the cloth even according to the design.
- We will cut the remaining cloth on the edges from where we can easily fold it and then stitch it and then from the upper side we will fold the design and mark it in the middle a straight line and cut a small mark.
- Take now our suit’s cloth and fold it and then mark it in the middle and cut a small mark and then we will place our design on it making sure that we do put the both lines on each other and then we will stitch it in the middle.
- And then we will stitch the design from all the four sides and we will then cut the extra cloth leaving some space and cut them even on edges to ensure that we can fold the bits remaining on the design.
- We will then straight out our cloth and then finally stitch it all around. You can attach cloth string even at the open edge.
- We can add then pearls on the outer edge of the design from the fabric glue (don’t worry the glue dries up quickly and isn’t noticeable).
I hope you enjoyed these fun and super easy designs. Keep reading FashionShala for more exclusive and fun stuff.
Stylish Neck Design Cutting & Stitching Tutorial
You’ll also like:


About Author
khaiza
Khaizraan Javeed, is a content writer at Fashionshala. She writes articles about the ways and means to keep common masses updated about the fashion and the ways one can learn about fashion sitting at home. She is a student of English literature and words and metaphors forms her best friend. She used these metaphors to make fashion metaphorically beautiful.