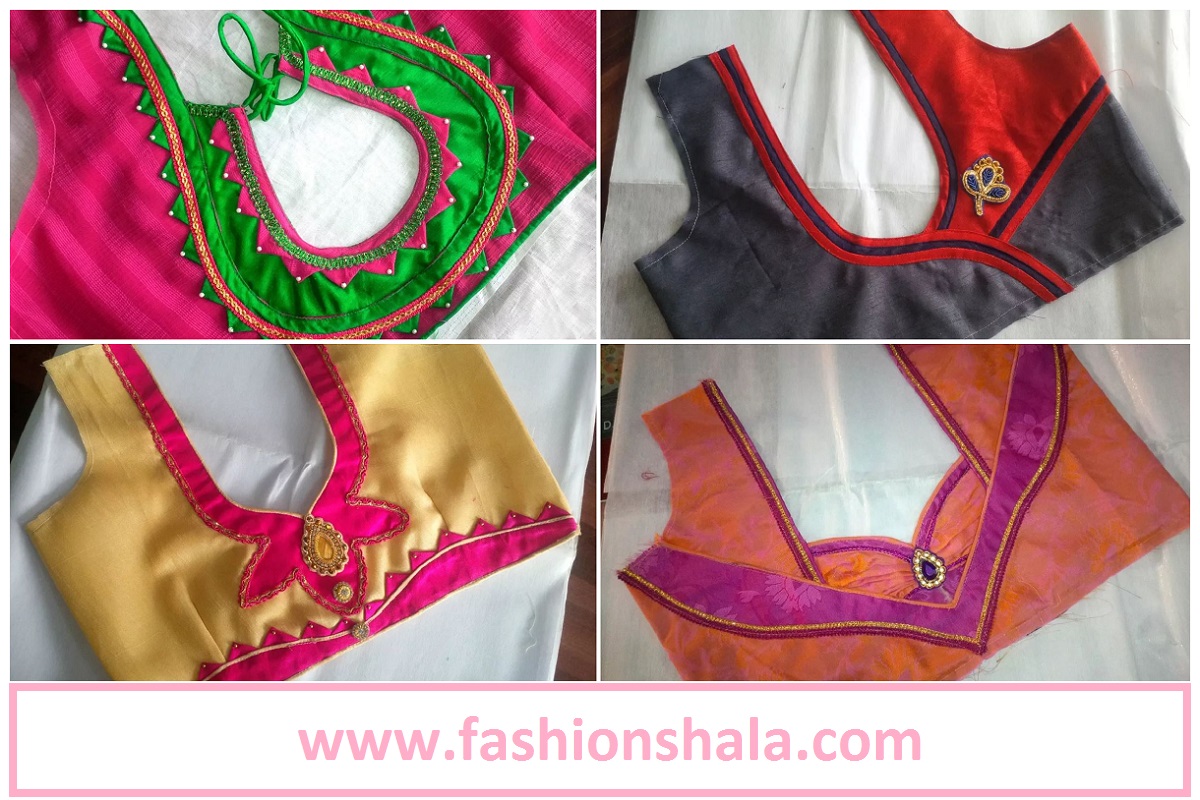
Trendy Blouse Neck Designs cutting and stitching
The most awaited season is the wedding season. Am I right? And with the season of weddings we arrive with some great blouse designs to help you manage your ethnic clothes. Whether it’s a lehenga or saree you really need a well stitched blouse to make your whole outfit highlight. Blouse have become a necessity on wedding season to all the girls and women because it can be paired up with anything- long skirts or even with jeans. So, to make things work for you we are going to tell you three different types of blouse designs, their cuttings and stitching as well. The three easy to stitch yet elegant to wear designs. Don’t miss out on any of them, because all of them can be cut and stitched at home.
Before getting on the procedure given below are the things required to stitch these three blouse designs.
Easy different model blouse neck design cutting and stitching
1. A sewing machine
2. Tailors chalk or you can use normal chalk as well
3. Marker
4. Inch tape
5. Scissors
6. Beads and needle
7. Fabric
8. Threads matching with the fabric
9. Tailoring canvas
10. Iron
11. Lace
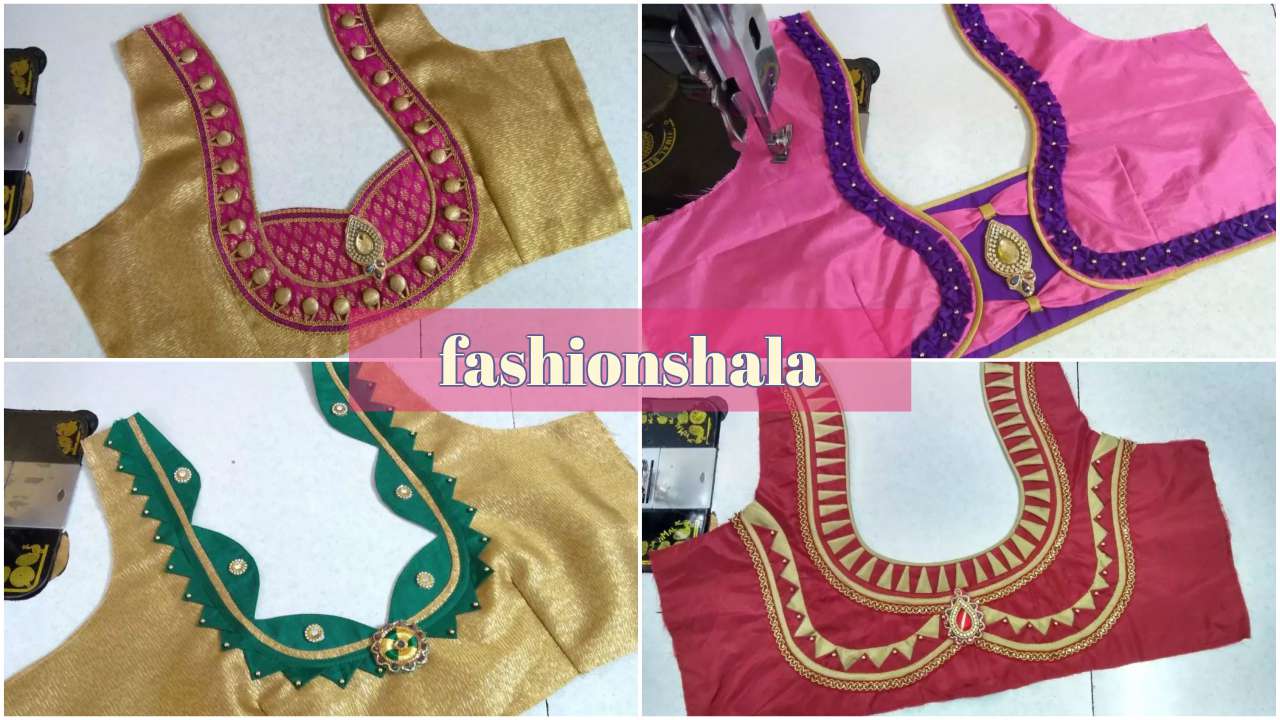
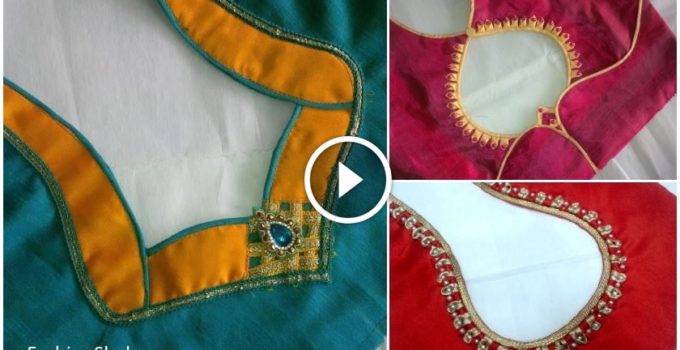
The Very First And Easy Blouse Design:
Procedure:
1. The very first step is to double the astar cloth( lawn cloth) and draw the back design of the blouse with chalk on astar.
2. Cut down the pieces of astar cloth using scissors according to the design drawn with chalk. ( To be exact there will be 4 pieces.)
3. Drawn the same design on the main fabric but increase the measurement with around 1 or 1.5 inch extra, to simply avoid mistakes.
4. Cut down the pieces of main fabric also using scissors according to the design drawn with chalk.( To be exact there will be 4 pieces)
5. Now, the cutting part is over ,the next step is of stitching. Stitch the pieces of astar on the pieces of main fabric. Don’t forget to keep astar on the main fabric and then stitch it. You can cut the extra part of main fabric.
6. After stitching the astar and main fabric together, you will have 4 main parts of the blouse, which will be the back design of the blouse.
7. The next step is to use different colored fabric for the extra decoration of the blouse.
8. The decoration includes making small leaves with that fabric and attaching them on the blouse. And giving it the final touch with pipen.
9. That’s all, the blouse is almost ready you just have to stitch those four main parts all together.
10. And the very last step is to attach beads on the blouse using needle and thread.
Read More: 20 Stylish and Trendy Saree Blouse Back Neck Designs
Moving on to the next and our second blouse back design
Procedure:
1. Firstly double the astar cloth( lawn cloth) and draw the back design of the blouse with chalk on astar.
2. Cut down the astar according to the design drawn in first step using the scissors. ( To be exact there will be only 1 piece.)
3. Drawn the same design on the main fabric but increase the measurement with around 1 or 1.5 inch extra, to simply avoid mistakes.
4. Cut down the main fabric according to the design drawn on it in the 3rd step using scissors.( To be exact there will be only 1 piece.
5.Draw the neck pattern of the back design with marker on canvas carefully. Cut it down using scissors.
6. The cutting part is over. The next step is to keep the canvas on the main fabric and iron them together.
7. After ironing them, simply just stitch them together. Canvas gives the pattern a good finishing look.
8. Stitch the astar with main fabric which we cut in the 2nd and 4th step. Keeping the main fabric under the astar. After stitching them together, cut out the extra part of main fabric.
9. Now, we have to attach the product created in the 7th step with the product created in the 8th step.
10. To make the blouse design decorative, the last step is to use lace and pipen.
Read More: 15 Awesome Saree Blouse Designs for Weddings
Easy patch work blouse design cutting and stitching
Procedure:
1. Firstly draw the back design of the blouse with chalk on the main fabric.
2. Cut down the main fabric according to the design drawn in first step using the scissors. ( To be exact there will be only 1 piece.)
3. Drawn the same design on the canvas using the marker.
4. Cut the canvas according to the design drawn on it in the 3rd step using scissors.
5. Stitch two different colored fabric on the canvas which was cut in 4th step according to the design. Canvas is used to give the pattern a good finishing look.
6. Now, draw the same design which was drawn in the first step but this time on the astar cloth with the help of chalk.
7. cut down the astar according to the design drawn using scissors.
8. Stitch the main fabric and astar, don’t forget to keep the main fabric under astar. After stitching them, cut down the extra part of the main fabric using scissors.
9. Use lace for decoration on the product created in the 8th step.
10. So the final step is to attach and stitch all the parts of blouse together.
The blouse design is ready.
Keep calm and sew on because happiness lies in wearing your self sewed blouse!
Thank you for reading this article, We hope this helped you.