Designer Frontslit Kurti Cutting And Stitching Tutorials
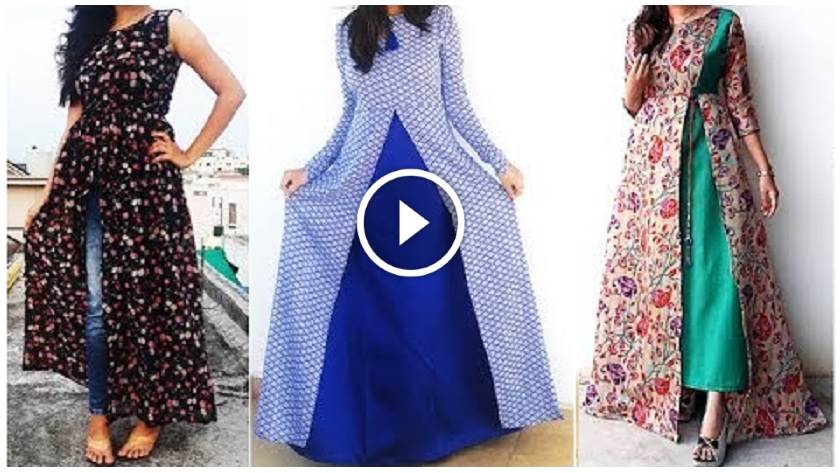
Do you which outfit is most liked by girls nowadays? It is kurti! Or tunic top as you may call it. Tunic tops are so much in trend right now — especially the one with slits. It will make you look classy and elegant.
You can pair it up with leggings, jeggings or even jeans. Some also wear it on shorts. In this article, we have shown you three different types of front slit designer kurti and how to make them at home in an easy method.
Let’s dive in this article and learn how to stitch the most beautiful designer kurtis in the easiest ways!
1. Designer Front Slit Maxi Kurti
This designer front slit maxi kurti is so much in trend nowadays. You can pair it up with leggings, jeggings or even jeans. Some also wear it on shorts.
Let’s start learning how to make this beautiful designer front slit maxi:
- Take a 3-meter fabric. 3 Meter will be more than enough to make this maxi cum kurti.
- If your material is not thick enough, you might want one-meter lining cloth.
- Let’s start with marking now. Take the base cloth or lining cloth and fold it four times.
- We will begin with shoulder marking. Mark shoulder point at 7 inches and arm also point at 7 inches and join both the ends.
- Now is the time for the bust part. Here we have taken 11 inches. Remember it if folded four times, so you need to calculate accordingly. Add two more inches for stitching purpose.
- For a shoulder to waist, we will take 15 inches and breath 9 inches. Join both the points and draw a line
- For the neck, the broadness of neck will be 3 inches, and front length will be 4 inches and 2 inches back length. Draw both the necks in curve shape.
- For armhole, we will divide the 7 inches shoulder into half and mark at 3.5 inches. Draw a curve armhole.
- For the final drawing of all the marking go to the link (timing: 2.25 min)
- Now carefully, we will do all the cuttings.
- Start with armhole and front neck. After than separate the front and back cloth and cut the front neck and armhole (0.5 inches deep)
- Now take the back part and cut the neck and back.
- Now choose the main fabric and secure it with pins so that it stays intact and does not move.
- Cute the main fabric in the same shape as the lining fabric. Do the same for the back side.
- Noitch.w with the help of sewing machine, stitch both the main fabric with lining cloth.
- Put notches on the neck and arm part. See to it that you don’t cut the sewed
- Do the same for the back piece also.
- Now, take the front part and back part and stitch it from the shoulder area.
- To sew the whole upper part, measure the chest part and waist part and mark it up so that you will get an idea about the gatherings for the lower kurti.
- Now, take the remaining rectangle fabric and sew it with needle and thread from the broader side. Don’t cut the thread, grab the remaining longer thread and pull it slowly and you will get gatherings.
- After you have made the gathering, Fold it in half and join it with the upper part.
- Here, we will make a slit in the middle part, so we will start stitching gatherings from the middle. If you wish to have a slit on the side, you can start stitching the cloth from the side.
- Pin it up to secure both the upper and lower fabric and sew it with the sewing machine.
- Overlock from the bottom and middle slit to secure all the threads
- And here you are ready with your designer middle slit maxi kurti!
2. Front Slit Long Gown Maxi Kurti
- For this design, you will need two types of fabrics. One plain and one printed.
- Plain fabric is of one meter and printed one is of three meters.
- For the top part we will fold the printed cloth into four folds
- Take the shoulder of 7 inches and arm of 7 inches. And join both the points.
- Right where the armhole is finished, measure the chest part. We have taken chest part of 11 inches
- For the chest part, measure your chess part and divide it by 4 (as it is four folded) and add 2 inches extra for stitching purpose.
- For the top part take atleats 15 inches. Start measuring from the top itself.
- The waist broadness is 10 inches. Join both the length and breadth
- For the neck part, we will mark at 4 inches broad and 2.5 inches long. Join both points by curve shape.
- Now, we will draw the armhole. As mentioned earlier we have taken 7 inches shoulder, so for armhole, we will take half of 7 inches, which is 3.5 inches and draw two curves: one for back and one for the front. For front, armhole make it 0.5 inches smaller.
- Now, cut all the marking and separate front and back side fabric.
- Now take the lining fabric and
- For the bottom, make the material and fold it in half lengthwise. First, we will start with the back side.
- We will take the length of bottom 40 inches plus 2 inches for stitching so total 42 inches and breath will be 10 inches same as the broadness of the top. Draw a long slant line and cut the fabric
- For the front part, do the same thing. Now you have two same structure. The only difference will be the breath, fronts breath is 11 inches, and backs breath is 10 inches
- Cut the front fabric from the middle for the slit.
- Now we will take the plain fabric for front side and place it upon the printed front fabric. Cut it in the same shape.
- For sleeves cutting again we have folded the fabric in four folds of 9 inches.
- From the open side, mark at 3 inches and draw the shape of sleeves. Draw one more a little 0.5 inch inside for the front sleeves
- We will measure the sleeves length at 28 inches for gathering purpose. ( we have taken almost 6 inches extra.) The broadness of sleeves is 5.5 inches
- Now, we will connect the 3-inch mark and 28-inch mark and cut it for making the sleeves
- Let’s start with the stitching. Take the top part and begin with the neck. Here, to make it more attractive we have cut small straps and place it on the neck curve, see the video for better understanding.
- Sew it with a sewing machine. Now turn it inside out and stitch the straps.
- After the neck take both the front and back fabric and do the shoulder fitting. After shoulder fitting takes the sleeves and join it and sew it.
- Fold the border of the sleeves and stitch it
- Now make the bottom part, fold it into half and at the bottom mark at 3 inches and draw a slant line till the top. And cut it
- Double wrap the borders and sew it. Take the plain fabric and place the printed material on it and join them properly and stitch it
- Now, we will take the top and bottom part and sew it together. Similarly, we will join the back bottom.
- In this way, the top and bottom will be joined.
- Now, turn it inside out and stitch it according to your body fitting and you will be ready with your designer front slit long gown.
3. Designer Double Layer Front Slit Kurti
- For this designer kurti, we have taken two cloths, Plain as well as printed.
- The size of plain cloth is 2.5 meter, and the printed cloth is of 3 meters.
- First of all, we will start by making the top part. For that, we will fold the fabric into 4 part.
- The shoulder will be of 7 inches, and armhole will also be of 7 inches
- For chest part, we will take 11 inches (divide your actual chest part with 4) and +2 inches for stitching.
- The length of the top part will be 14 inches and waist will be 10 inches
- We will divide the shoulder at 3.5 inches for armhole. And will draw a curve.
- The neck will be 4 inches broad and length will be 3.5 inches, and we will draw a curve by joining both the curve.
- Now we will cut all the marking, and we will get a front part and back part.
- Let’s move to the bottom part, Take the plain fabric and four-fold it and place the top part half folded at the border of the bottom part and mark the broadness of the top part.
- Take hips breadth 12 inches and join it.
- We will take bottoms length of 38 inches and cut it in a little curve shape
- Now we will take the printed fabric and place the plain fabric on the printed cloth and mark it in flair shape. We will keep the length of printed fabric 44 inches and cut it.
- For front slit, we will mark at 8 inches and draw a straight line to make the slit.
- We will cut the top part, Take the printed fabric and place the top part on it and cut it in the same shape.
- Take the front top part and mark at 8 inches and draw a line till the top and cut it in slant.
- Now for sleeves, again fourfold the fabric and mark at 3 inches and draw the sleeves. The length of the sleeves is 17 inches, and wideness is 6 inches
- Now we will join both the points and cut the fabric.
- Again we will come to the top part. Take the printed top part and join both the printed one and a plain one. start with stitching from the neck
- We will now join the front and back part and stitch it from the shoulder part and then we will start with stitching the sleeves and will double fold the border and sew it.
- Now we will take the bottom side and double fold the borders and sew it to secure it properly.
- Take the base bottom, that is the plain bottom and place the printed fabric on the top and stitch it to fix it. Do the same thing for the backside bottom.
- Now we will take the top part, Place it on the border of the bottom part and join both from front and back.
- Now measure the chest part, waist part and mark it and stitch it so that the kurti will fit you and do the same for the sleeves fitting.
- After stitching and joining everything, in the end double fold the bottom border and sew it.
- You are now read with the most creative, innovative, designer from slit kurti.
Hope this article will help you in stitching a designer slit Kurtis which you will find everywhere. We will love to hear back from you. If you don’t understand any point, you can refer to the video part for clear understanding.