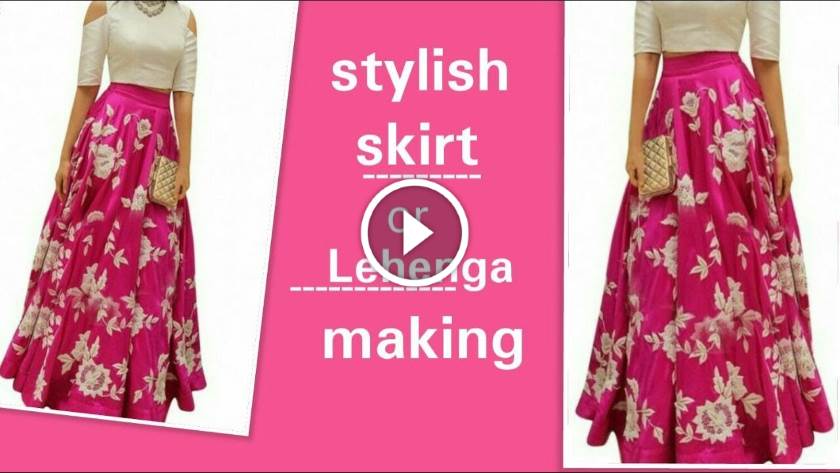
Long Skirt Cutting & Stitching Tutorials
Hey Girl! Are you looking for something that will look classic and elegant and is also something traditional that you can wear to any Indian parties or wedding ceremony? You are here at the right place. Below in this article, we have written a step by step guide on making long skirt cutting & stitching.
We have written about three different types of skirts that you can prepare in an easy manner and in a concise time, you will also save a lot of money. All you need is a little patience and a little stitching skills.
You can wear a crop top or Blouse to look classy. To add a little more elegance and to look trendy you can also wear a blazer or jacket on the skirt, and if you want a little more traditional look, you can also carry a dupatta along with you lehenga choli.
Let’s dive in and learn to stitch Skirts.
Umbrella skirt
- You will need a lining cloth of 2 meters. Double fold it into the half.
- After folding it into the half, Fold it diagonally, which will produce a triangle shape, and at the end, you will have four folds.
- Now, You will need a measuring tape to measure your waist for the skirt and the flow and length of the skirt.
- In any skirt, waist and length are the two most important things to keep in mind.
- For the waist, Add an extra 4 inch than your actual waist size, so that it will be very convenient for you to wear it.
- Take a corner of the triangle and mark your waist size, add 4 inches extra.
- As this is for lining cloth, we usually keep the length of it a little less than the actual fabric.
- Here we are considering 32 inches long which will also include 2 inches for the belt. Mark that 30 inches into a curve shape.
- Now cut both the waist as well as the length carefully.
- Take the main fabric that you want to make the skirt of. You will have to fold it in half and then in triangle shape just as what we did for the lining cloth.
- We have to repeat the same procedure now. So, take the lining cloth and keep it on the main skirt material
- Mark it on the fabric. Make sure that for measuring the length, you will have to consider the actual length of the skirt you want. As the lining cloth is always shorter than the outer fabric. Here we have taken 36 inches as the length of the dress.
- We will take a total of 37.5 – 38 inches, their extra inches is for sewing purpose.
- Now, draw the curve line and cut the length and waist carefully.
- Here comes a little tricky part now. After cutting the clothes you will see that both the side is not the same, one side is a little smaller than the other side. For this what you have to do is take the remaining extra cloth and cut it in the shape of the smaller side and than join it with the help of pin to make it complete. Again you can refer the video. (time:3.45min)
- We are now done with the cutting of skirt. Now is the time for the belt.
- Measure the size of the waist. Here it is 15 inches. The width of the belt is 5 inches
- Now, take two lining cloth (for front and back) of 15 inches length and 5 inches wide. And also two main fabric of the same size
- In front, we will keep it simple, and in the backside, we will put elastic for better fitting and comfort
- Now take your sewing machine. Firstly, you will have to join that small piece of cloth which we had attached with pins. (refer point 16)
- Take both lining cloth and main cloth and keep it upon each other.
- Now take the belt cloth and keep it on the waist side. Adjust it on the waist side properly by holding the belt cloth inside out.
- Sew it with the help of a machine and now fold it outwards so that the original design will appear on the top and then sew it again. This will make the finish look attractive.
- Now we will put a 1.2-inch thick elastic inside the belt and 12-inch long elastic.
- The backside of the skirt is now fully prepared. Now we will start with the front side
- Take the belt piece and sew it from a side with the backside belt so that both the sides stay together
- And now Again apply the same procedure for the belt. (refer point 23 and 24)
- After belt, sew both the side of the skirt from top to bottom.
Tip: Never sew the lining cloth till the very end. You have to stitch at least 4-5 inches above the main cloth.Always remember that you have to stitch the main cloth first and after that the lining cloth. This makes the wear of skirt comfortable, and the skirt remains bouncy.
- Now sew the other belt side, and you are almost ready with your beautiful skirt.
- The last thing remaining is to sew it from the bottom basically to overlook the bottom so that the threads don’t come out.
- As you can see the skirt is made with beautiful orange and gold color you can pair it with a golden crop top and you are ready to rock the wedding or Diwali party or any other small functions.
Full flair umbrella skirt
This umbrella skirt is my favorite as it is made from an old saree. That is best from the waste. Want to learn how you can easily use your or your mom’s old saree and make it into a gorgeous flair skirt? Read the article and learn it step by step.
- As said earlier, For any skirt type waist and length are the two important factors to keep in the mind.
- The formula to calculate waist radius – Hip(36) + 2 inch (belt) = 38”/6.28 = 6”
- Here we have taken the waist radius of 6 inches and a length of 40 inches.
- For an average adult you will need at least 5 meters of cloth, and for kids, you will require 3 meters of fabric. (considering there waist radius to be 4 inches)
- Now take a 5-meter saree and fold it into four folds. The saree we have taken is same from all the side. The print is, so there is no need to remove the pallu of the saree.
- Take one corner and mark a 6-inch waist radius and draw a curve.
- Now we will take full length which is 40 inches. Now draw a curve from one corner to another corner making it a full curve shape
- Cut the waist radius and length, and now you have your umbrella flair
- You have four layers of flair. Now open the umbrella flair and keep it on the opposite of each other.
- Now take lining of 2.5 inches to fold it in a triangle shape. Now take the main saree fabric and keep it on the lining and mark it and cut it. Remember that the lining is always shorter in length than the main fabric. So cut the lining at least 2 -3 inches shorter.
- Join one side of the lining cloth and keep the other side open
- Now take both the flairs of main fabric and stitch it from one side just like we did in the lining cloth.
- Keep both the lining and main fabric on each other properly and stitch it at the waist radius side.
- Be careful while stitching the skirt. If your main fabric stretch a bit, you can take a small crease to make it flowy
- For the belt, take a cloth of 5 inches and width of waist radius I e 6 inches
- Now we have to attach the strap at the waist radius( If you are confused you can refer the video link)
- You need to stitch the other side of the skirt keeps at least 1-inch stitch margin.
- Then you have to stitch all the four layers of skirt that is two lining cloth and two main material till 3 inches.
- After 3 inches, start stitching the main fabric first and after completing with main fabric stitch the lining cloth.
- Keep in mind that you have to stitch both the main fabric and lining differently for more flair and comfort.
- Stitch the belt and fold it and stitch it again to put the elastic inside the belt.
- Take the elastic at least 2 inches shorter than your low waist. Insert it and join both the side of the elastic by sewing it and our skirt belt is ready.
- To keep the elastic in the middle, Sew it from between to give it a finished design.
And you are now ready with your skirt!
How to Make Pleated Long Skirt
- We will make this skirt by making pleats.
- Here we will take two meters of cloth.
- Fold the cloth four times. Measure the length and keep 2 inches extra for the belt.
- Cut the length of the skirt.
- Take an inner or lining cloth or 2 meters.
- Fold it in a similar way as the outer or main fabric.
- Now attach inner and the main fabric from the belt side and also from one side and cut the inner from the bottom at least 2 – 3 inches to make it shorter. Keep one side at least 3 – 4 inches unstitched to place the zip.
- We will stitch the zip/ chain on the open side. See to it that you place the zip where you are comfortable and sew zip with the skirt.
- After the zip is stitched, now is the time for the belt. Take a cloth 5 inch extra than the waist size. If your waist is 30, then take the cloth of 35 inches. Stitch the strap and elastic with each other. And keep the belt aside.
- Mark 3 3 inches for the pleats and sew it by taking the pleats at the marks. First, do it on the front side and after finishing the front side start with the back side and do the pleatings at the distance of 3 inches
- After you are done with the belt, fold the skirt and stitch it at the remaining side.
- Now take the belt that you had made earlier and attach it with the skirt.
- For any confusion, you can watch the video
- As mentioned earlier that the belt should be 5 inches longer than the waist size, the 5 inches will be used for attaching the hooks. (buttons) Keep the hook right above the zip.
Now your skirt is ready, wasn’t this the easiest way to make a dress!
We hope that this comfortable skirt making techniques help you to create a superb and aesthetically beautiful skirt and pair it with your favorite crop top or blouse. Tell us how you liked this article and tell us how you made your skirt.
Top Office Wear Trends For Indian Women