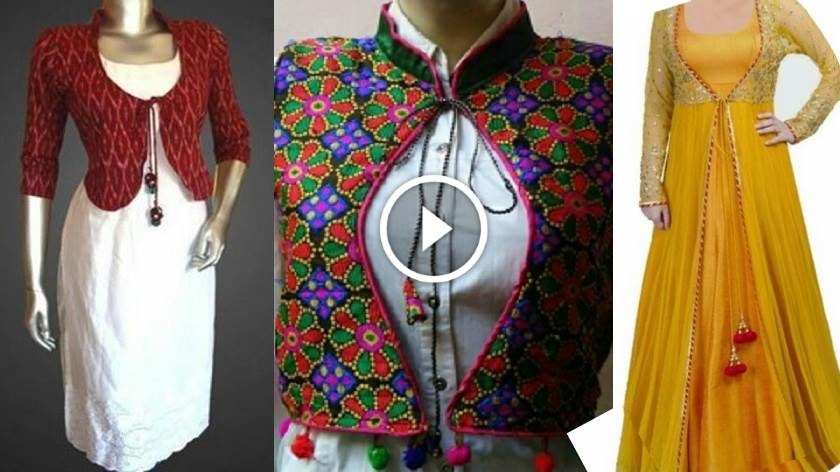
How To Make Kurti Jacket: Cutting & Stitching Tutorials
How To Make Kurti Jacket!
The world is changing and so are we.We are getting modern day by day.But,no matter how modern we get day by day, traditional outfits can never go out of style. In fact, they are getting better day by day.
No one can beat the beauty of Indian outfits. Kurti jackets specifically are doing rounds like no tomorrow.They are capable of adding an oomph to any traditional kurti or even a dress if worn perfectly.
To own one you definitely have to burn a hole in your pocket.But keeping up with the fashion trends is also important.So this can be a one stop solution to all your problems.
Here I will be showing you some easy techniques which will help you to cut and stitch your own kurta jacket that too in three different styles.The procedures may be a little time taking but if you invest some time I gurantee you that you will get awesome results.
I have included three types of shrugs,you can choose one according to your preference or try out all the three ones.
Cutting & Stitching a Shrug (Bolero Jacket)
The steps are as follows:
- Take a 1 meter jacket and a 1 metre lining.
- Take measurements of the length,shoulder,armhole,front neck depth,chest size,sleeves length and sleeves opening of the jacket according to your body size and note it down.
- First double fold and then four fold the 1 metre cloth.
- Take 2 inch extra(for stitching) than the actual length of the jacket and mark it on the cloth with a chalk.
- Measure the shoulder length taking 0.5 extra(for stitching) than theactual length and mark it on the cloth with a chalk.
- Now measure front neck depth and chest(take extra 1.5 inch) for stitching and mark it on the cloth with a chalk.
- Cut it out and separate the two pieces.
- Take any one piece and measure the armhole and cut it out.
- Repeat the same on the other piece.
- Once done,take a cloth for making the back piece and cut it according to the length of the front piece.
- Then,cut the lining according to the shape of the front pieces and stitch it on the opposite side starting from the shoulder.
- Then stitch the cut out back portion with the front.
- For the collar,measure the size according to your body,mark it and then cut the collar material.
- Now double fold the material and make a small cut at the end.
- Turn it and then stitch it with the jacket.
- Take a 1m readymade string matching to your kurta cloth and cut it into two pieces.
- Stitch readymade pompom balls at the end of the string.
- Stitch both the strings to the open ends of the front side of the jacket.
Voila! Your own bolero jacket is ready.
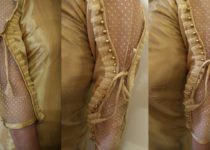
Cutting & Stitching a Net Over Jacket
The steps are as follows:
- Take 1.5 m net cloth and half fold it.
- Take measurements of the length,breadth,shoulder,arm hole,waist,front and back neck depth,sleeve length for the jacket and mark it on the cloth with a chalk.
- Now place the cut material on another part of the cloth and cut in the same shape taking 0.5 inch extra.
- Cut the depth of the back according to your desire.
- Take the front neck depth a little deep and for a better look create a V shape.
- Take two pieces of the same cloth for full sleeves.Measure and cut them and then stitch the ends of the sleeves.
- Now take a matching opaque cloth,cut it into thin straps and stitch it to the shoulder,sleeve end and sides of the jacket to give it a beautiful finishing.
- Stitch ready made strings to the open ends of the front part of the jacket and attach pom pom balls or leave it as it is at the end.
- Now stitch the back with front parts of the jacket starting from the shoulder.
- Stitch the sleeves with the armhole.
Voila! Your net jacket is ready.
How To Make Kurti Jacket
The steps are as follows:
- Take 1 m cloth and take measurements(length,front neck depth,chest,waist,shoulder),mark it on the cloth with a chalk and cut it out.
- Separate the two pieces.
- Place it on another piece of the same cloth and then cut according to the length to make the back of the jacket.
- Stitch the front parts of the jacket with the lining.
- Now turn it and stitch again.
- Then,stitch the front parts with the back of the jacket starting from the shoulder.
- Measure the size of the collar,mark it with a chalk and then cut the collar material according to the size.
- Now, place a cloth matching to your jacket on the collar material and fold the collar material and stitch it.
- Once it is done,stitch the collar with the jacket.
- Take readymade strings,stitch them to the open ends of the front side of the jacket.
- Stitch pompom balls to the end of the strings or leave it as it is.
Voila! Your brand new kurta jacket is ready.
Now you can also look gorgeous without burning a hole in your pocket. Kurti jackets will no more remain an aspiration now.Team it up with plain kurtis, add a chunky earring and a small bindi to amp up your look.
Following the above procedures you can make yourself one that will be unique from the market brought ones and that’s exactly where you will stand out. Hope these tricks have helped you.
Stay tuned for our next update. Till then stay fashionable!