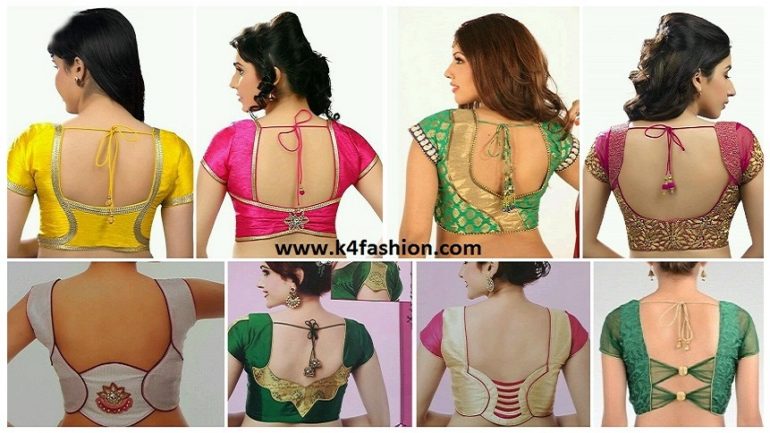
Blouse Back Neck Design Cutting & Stitching Tutorials
“Fabrics doesn’t make exquisite dresses, it is the stitches” well, that’s really true.
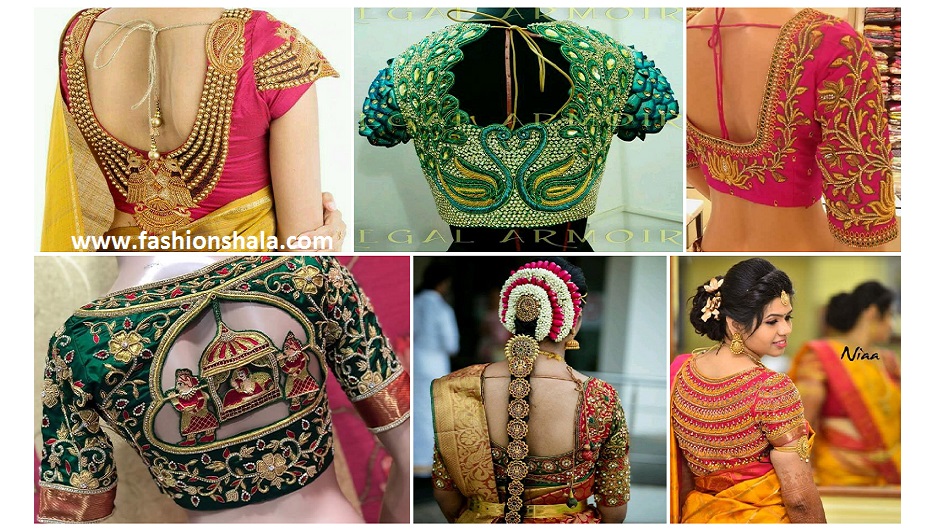
And we want all your dresses to be exquisite , with easiest stitching procedure that is why not one or two, but we are back with three blouse back designs!
The designs have simple procedure but the look of each design is undoubtedly different and awesome.
One can’t buy happiness but one can surely see our blouse designs and stitch them. So let’s get started!
Before getting on the procedure given below are some of the basic things required to stitch these three blouse designs at home.
Things Required
- A sewing machine
- Tailors chalk or you can use normal chalk as well
- Marker / pencil
- Inch tape
- Scissors
- Beads and needle
- Fabric
- Threads matching with the fabric
- Bakram
- Iron
- Lace
Let’s start with procedure of cutting and stitching step by step for each blouse design separately.
Useful Read: Simple and Easy Blouse Back Neck Designs Cutting and Stitching
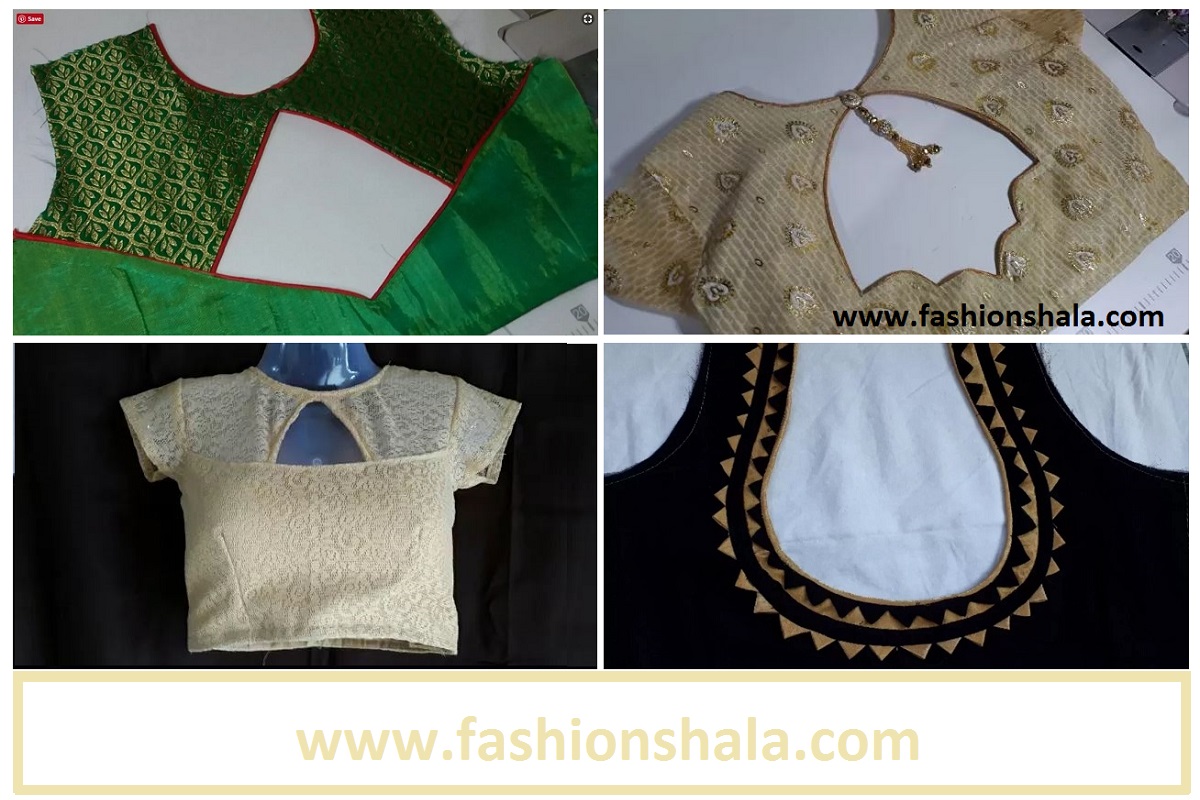
1. Blouse Back Neck Design Cutting & Stitching
- Take the astar double fold it. Now draw the measurements for the blouse and design on the astar using chalk.
- Cut the astar carefully into three pieces according to the measurements and design drawn in the first step with the help of scissors.
- Now take bakram and main cloth, and cut them both exactly like the first piece of astar using scissors. Stitch bakram, main cloth and the astar together.
- Now take another piece of main cloth and cut it exactly like the second piece of the astar using scissors. Finally, Stitch the main cloth and astar together with the sewing machine.
- Now take one last piece of the main cloth and cut exactly like the third piece of the astar using scissors. Finally, stitch the astar and main cloth together with the sewing machine.
- Attach all the three parts of the blouse which we created in the third, fourth and fifth step by stitching them together very carefully.
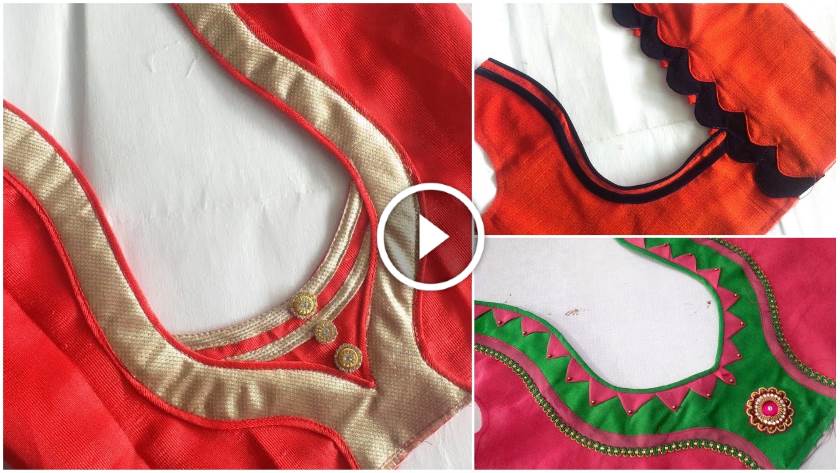
- For extra decoration, use pipen and lace and attach them on the blouse where ever needed using thread and needle.
Useful Read: Latest Stylish Kurti Neck Design Cutting and Stitching Tutorial
2. Simple Blouse Back Neck Design Cutting & Stitching
- The first step is to double fold the astar and simply draw the blouse back pattern with chalk.
- After drawing the back pattern, cut the astar with scissors.
- Put that astar on the main fabric of blouse and cut exactly the same pattern as we cut in second step.
- Now, we will take bakram, and draw the main design for the back of blouse with marker or pencil.
- We will cut the design and iron it on our main fabric which will used for the design.
- After ironing them together, stitch them carefully. Now, cut the extra fabric and keep it aside.
- Take the astar and main fabric which was cut in the first and second step.
- Attach them together by stitching.
- Again, cut the extra part from the blouse and keep it aside.
- Now the main step is to attach the design which was created in the seventh step and blouse which we created in the last step.
- In this step stitch the design on the back of the blouse.
- Now to make the blouse look heavy and party wear, cut down small triangle shaped pieces from the fabric and attach it on the whole back design of the blouse.
- Complete the whole design by attaching pipen and beads on the design using thread and needle.
Useful Read: Kurti Collar Neck Design Cutting & Stitching Tutorial
3. New Model Blouse Back Neck Design
- Start with double folding the astar and drawing the blouse measurements.
- Use scissors and cut the astar as per the measurements drawn in first step.
- Take the astar which was cut in first step, put it on the main cloth, cut the main cloth as per the astar. After cutting now stitch them together properly.
- Now, Take bakram and simply double fold it.
- Draw the main design of the blouse on bakram with pencil or marker.
- Cut bakram using scissors as per the design drawn in last step.
- Take the main cloth and cut it exactly same like the way we cut bakram in last step.
- Iron the bakram on the main cloth carefully and then only stitch both of them together.
- Next step is to take another bakram and double fold it.
- Draw the design on the bakram using the chalk according to the astar which was cut in second step.
- Take that piece of bakram and cut the same design on the main cloth also and iron them together.
- Stitch the bakram and main cloth, cut the extra cloth.
- Take the astar which was cut in first step, put it on the main cloth, cut the main cloth as per the astar. And stitch them together.
- The important step is to attach both the designs which created in the eighth and twelfth step with the main blouse created in the thirteenth step.
- Stitch the designs on the back of the blouse.
- Last step is to give the blouse a final touch with pipen and buttons.
Useful Read: Front Neck Design for Kurti Tutorials
That’s all for now, hope you enjoyed reading. Thank you!